This is an Indonesian language based blog

Pertama2 gw mo ngucap Bismillahirohmanirohim
Trus, mohon maap kalo nih blog gw tulis ngga pake bahasa formal, nyante aja lah bro.
Abis itu, gw cuma nulis saat gw mau atau butuh karena tujuan nih blog cuma sebagai reminder aja karena gw pelupa & belum banyak pengalaman tentang Linux.

Senin, 12 Oktober 2015

Tutor Mount/Unmount USB OTG di Custom Rom KK ColorOS 2.0.1i PureImage 2.0+ from Neo 5

Find 5 Mini gw baru aja di install Custom Rom KK ColorOS 2.0.1i PureImage 2.0+ from Neo 5, sebelomnya ngendok di JB pake MIUI 4.10.8. Setelah tes sana sini, bongkar pasang sana sini pula biar gw nyaman, baru nyadar kalo colokin flashdisk USB OTG kesayangan, ga ada fasilitas mount/unmount nya. Kan serem bro, takut ilang file2nya atau malah ngerusak flashdisknya atau port micro USBnya. Tanya sana sini ga membuahkan hasil, so alhasil gw melakukan eksperimen deh. Ini hasilnya gw tulis & share dimari biar semua user Find 5 Mini yg doyan make Color OS pada bisa nikmatin Custom Rom KK ColorOS 2.0.1i PureImage 2.0+ from Neo 5 dengan nyaman.

Syarat & Bahan :
1. Udah terinstall XInternalSD.
2. Udah terinstall Root Explorer.
3. Udah terinstall Busybox Free.
4. Install [root] StickMount dari Chainfire.


Caranye :
1. Pindahin file eu.chainfire.stickmount-1.apk dari folder root/data/app ke root/system/app, abis itu reboot.

2. Buka StickMount, download pluginnya, kalo udah selesai ya tutup appnya.

3. Buka XInternalSD, uncheck Enable for all apps, tap Disable for apps, check Root Explorer & StickMount.


4. Masih di XInternalSD, tap Enable for apps, check semuanya kecuali Root Explorer & StickMount.


5. Colokin Flashdisk USB OTG, ntar minta root permission, kasihin aja. Trus ntar ditanya mo auto manage mount Flashdisk USB OTG (gw lupa hehehehehe), check kotak kosongnya biar StickMount Kepilih, trus Tap Allowed.
6. Pertama kali selalu mountnya dobel, sistem ColorOS melakukan mounting, StickMount juga mounting. Nah, Unmount yg StickMount (di notification ada) abis itu cabut USB OTGnya, reboot.
7. Abis reboot, colokin lagi Flashdisk USB OTGnya, kali ini mountnya bakal cuma StickMount doang.

8. Browse pake Root Explorer ke root/storage/emulated/0/usbStorage, disana ada folder sda1, check folder, tap titik tiga di paling bawah kanan, pilih Create shortcut bwt bikin shortcut di homescreen.

9. Nah, sekarang kalo nyolokin Flashdisk USB OTG, StickMount langsung ambil alih proses auto mounting dan manual unmount, trus akses ke Flashdisk USB OTG bisa langsung dari homescreen. Dengan gini paling ngga Flashdisk USB OTG jadi lebih aman. DONE.

Credits :
-. Allah the most gracious and the most merciful, the one who brought the beginning and brought the end. All is naught without Allah's permission.
-. My lovely wife, thank you for being the one that gives comfort to my heart.
-. All of the Find 5 Mini Indonesia group members on Facebook.
-. Mr. Bewok Doank for the Custom Rom KK ColorOS 2.0.1i PureImage 2.0+ from Neo 5
-. Mr. Shouhier for our discussion about how creepy it is to just unplugged without unmounting (actually it's just me ranting alone hehehehe)
-. Mrs. Yulianti Muhammad who had ask me to move on to Custom Rom KK ColorOS 2.0.1i PureImage 2.0+ from Neo 5 but after I did, she left me and runs back to JB.

Minggu, 04 Oktober 2015

Selasa, 29 September 2015

Tutor Downgrade Find 5 Mini Karena Ganti Partisi

Benernya sih udah ada tutor downgrade, tapi karena akhir2 ini sering ditemukan kerusakan emmc di berbagai tipe smartphone yg mendapatkan feature ganti partisi (untuk mengatasi insufficient memory). Mungkin untuk Find 5 Mini (R827), cara terbaik adalah downgrade ke color os v1.0.0i versi 140717 atau beralih ke custom rom color os v1.2.2i hasil oprekan bang Ajo Grage.

PERINGATAN, INI TUTOR MUNGKIN MASIH ADA CACAT, JD GW GA TANGGUNG JAWAB KALO HAPE LO KOIT, BIKIN KEBAKARAN ATAU MENGUNDANG KIAMAT. RESIKO LU SENDIRI YG NANGGUNG, GW GA IKUTAN.

I. Pelajari Apakah Sudah Melakukan Ganti Partisi Atau Belom.
User musti tau dulu apakah udah menjalani prosedur Ganti Partisi atau belom, kali aja ada yg beli sekon atau udah bawaan pabrik pas beli udah Ganti Partisi. 
BTW PASTIKAN APAKAH MASIH DI JELLY BEAN ATAU SUDAH KITKAT, APAKAH INTERNAL 4GB ATAU 8GB. Karena TUTOR INI GA BERLAKU UNTUK YANG SUDAH KITKAT DAN INTERNAL 8GB, KALO MASIH MAKSAIN YA GW GA TANGGUNG KALO ERROR BERAT, MATOT, BOOTLOOP ATAU MODYAR.
Oke, pasang diskinfo dari playstore. kalo liat hasilnya kaya gambar dibawah, maka bisa dipastikan udah ganti partisi.
Liat tulisan "Logical Volume Manager"?

Ada tulisan "Device-Mapper"? sebenernya sama kaya diatas, tapi versi diskinfonya lebih baru jd bisa baca isinya "logical volume manager" tapi ngga dalam bentuk partisi mandiri

Kalo hasilnya ngga kaya diatas, maka partisi android di posisi normal.

II. Mengembalikan Struktur  Partisi
1. Masuk ke Setelan - Lainnya - Ganti Partisi atau kalo bahasa Inggris Settings - Other - Change Partition, kaya di :

2. On-kan "Konfirmasi Menghapus" dan Tap "Ganti Partisi". Cara ini dikasih tau Bang Shohier, dia bilang dengan melakukian Ganti Partisi yang kedua kalinya akan mengembalikan struktur partisi seperti semula.


III. Downgrade ke Color OS v1.0.0i versi 140717 atau ke Custom Rom Color OS 1.2.2i by Bang Ajo Grage.
1. Bwt Downgrade ke Color OS v1.0.0i versi 140717:
   -. Download official rom Color OS v1.0.0i versi 140717, di files/doc grup udah ada linknya tinggal download aja, Taro file diluar folder Downloads.
   -. Pastiin Batere diatas 80%
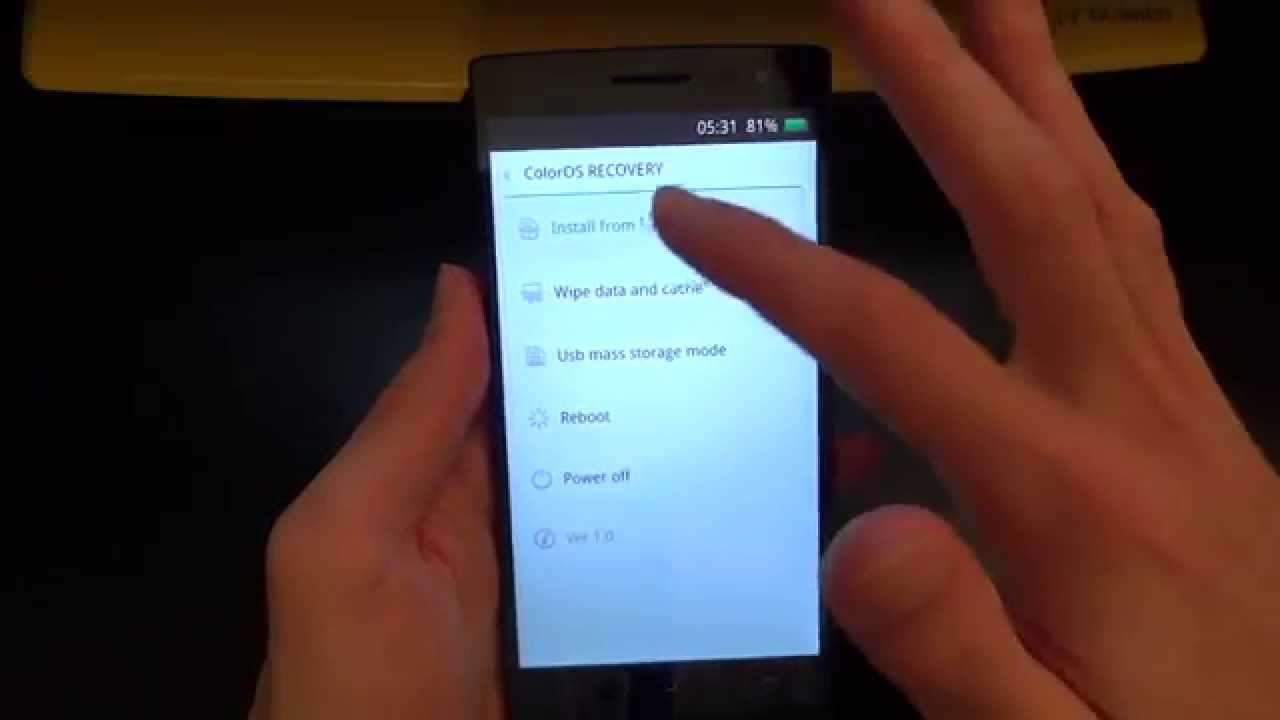
   -. Ke Recovery Mode (matiin hape, nyalain lagi dengan mencet tombol power dan volume down berbarengan), pilih bahasa inggris, tap "Wipe data & Cache", tap "Install From SDCARD", pilih file yg barusan di download, tunggu sampek selesai walau lama banget.


2. Bwt Downgrade ke Custom Rom Color OS 1.2.2i by Bang Ajo Grage.
   -. Cari di Files/Doc grup, langkah udah ada disana lengkap.

Done.


Credits :
-. Allah the most gracious and the most merciful, the one who brought the beginning and brought the end. All is naught without Allah's permission.
-. My lovely wife, thank you for being the one that gives comfort to my heart.
-. All of the Find 5 Mini Indonesia group members on Facebook.

-. Mr. Ajo Grage for the Color OS 1.2.2i
-. Mr. Shouhier for telling me how to restore partition structure
-. Mr. Wahyu Putra Kistriyanto & Mr. Rianto Putra Grp for their screenshots that I use for this tutorial
-. Mr. Juan Kambienks for being the loose Kambienks the other day of Ied Al Adha

Kamis, 17 September 2015

Official Rom Oppo

Download latest version of Oppo official rom : www.oppo.com/id/downloads
Previous version : http://61.28.225.57/download/

Flashing rom KK dari kondisi JB dan Kembali ke rom JB dari KK

Bahan : Semua ada di grup facebook find 5 mini reborn.

I. Flashing rom KK dari kondisi JB.
1. Siapin file custom recovery KK yg flashable yg dibutuhin untuk instalasi rom. Siapin juga file repartisi KK juga.
2. Wipe /system, /data, /cache dan dalvik cache
3. Flash custom recovery KK yg flashable.
4. Reboot recovery
5. Masuk custom recovery KK yg sudah di flash, flash file repartisi KK.
6. Wipe /system, /data, /cache, internal storage dan dalvik cache
7. Reboot recovery
8. Cek apakah partisi2 yg tadi sudah di wipe bisa di mount. Kalo ada yg ga bisa, coba unmount semua & install rom yg basisnya CM atau AOSP dulu. Setelah masuk homescreen, matiin & balik lagi ke recovery. Kalo partisi2 diatas bisa di mount, berarti sudah aman.

II. Kembali dari rom KK ke rom JB.
1. Siapin file custom recovery JB yg flashable yg dibutuhin untuk instalasi rom. Siapin juga file repartisi JB juga.
2. Wipe /system, /data, /cache, internal storage dan dalvik cache
3. Flash custom recovery JB yg flashable
4. Reboot recovery
5. Masuk custom recovery JB yg sudah di flash, flash file repartisi JB.
6. Wipe /system, /data, /cache dan dalvik cache
7. Reboot recovery
8. Untuk mencegah notifikasi sdcard rusak, disarankan dengan sangat menginstall rom berbasis AOSP JB terlebih dahulu, setelah masuk homescreen, matiin & balik lagi ke recovery. Setelah ini akan aman untuk merestore rom JB yg telah di backup sebelomnya atau menginstall rom lain selain AOSP JB

Sekali lagi, bahan ada di grup facebook find 5 mini reborn

Credit : 
-. Allah yang Maha Pengasih dan Maha Penyayang, yang Menghidupkan dan yang Mematikan, semuanya tidak akan tercapai tanpa izinnya.
-. Bini Gw yang Cantik, makasih udah jadi penenang hati gw.
-. Semua anggota grup Find 5 Mini Indonesia di Facebook.
-. Bang Ajo Grage buat file repartisi JB "R827_Multi_Repartition.zip" dan file repartisi KK "RepartisiSystemKK1.2GB.zip"
-. Mbak Yulianti Muhammad yg sedikit banyak hinting kalo bulak balik JB KK ga selalu perlu flashtool.

Minggu, 30 Agustus 2015

AOSP by Shiliarr95 suitable for daily use (based on AOSP by Ajo Grage)

Ini Rom hasil Modingan gw atas Rom AOSP bang Ajo Grage, Khusus bwt yg doyan memory ringan.

2 Versi akan gw sediain, Insya Allah, versi Original Development & versi Lite.

Original Development tuh versi yg gw masukin semua Trial & error. Kalo Trial sukses, gw publish dimari. kalo error alias banyak bug, ga akan gw publish. Lite tuh, versi yg gw publish kalo ada perubahan besar sehingga menyentuh standard dari rom.

Feature :

You got every thing basic in the original rom have except screen-off gesture


BUG :

Yang belon ada solasinya cuma, kalo pake Kamera, ga bisa ngatur level iso atau level exposure, ga ngarti knapa bisa gitu.

Yang jelas sih, sensor jauh lebih lengkap dibanding AOSP Turbo & AOSP basicnya bang Bewok. Kalo masalah perbandingan kamera, overall emang dipegang oppocamera, tapi kalo malem cuma kamera MIUI 4.10.8 yg paling oke.

Flashing :
As Always, kerusakan apapun karena ROM, Tanggung Jawab Lu Sendiri. Gw paling bisa bantuin doang. Makanya, sebelom nge-flash, ada baiknya lu melakukan :

1. Berdo'a
2. Pastiin udah pasang custom recovery. Kalo belom, mampir di : http://bit.ly/Tutor-Recovery-JB dulu
3. Berdo'a lagi biar afdhol
4. Bikin backup rom yg saat ini lu pake via custom recovery
5. Sambil nunggu selesai ya, Berdo'a lagi

Nah mulai ngeflash nih, siapin hati jangan sampek keder duluan :

6. Kalo udah, Format /system, /data, /cache & /dalvik cache
7. BTW, sembari ngeformat jangan lupa berdo'a yah, kali aja salah format malah......... ya resiko lu sih
8. Udah? install zip, pilih lokasi rom (sebaiknya ga dimasukin ke folder manapun, kalo masih di folder Download ya keluarin aja
9. Seperti biasa, banyakin berdo'a soalnya proses hampir selesai
10. Ntar kalo udah selesai biasanya auto-reboot, mulai deh Do'anya dikerasin lagi biar yakin ga bootloop
11. Kalo udah masuk HomeScreen ya aman deh.

Okeh, sekarang yg harus lu lakukan setelah masuk homescreen :

12. Bwt yang kehilangan IMEI alias kalo nelpon *#06# dibilang invalid, udah gw sediain chamelephone di ROM, tinggal pake, isi, apply & reboot.
13. Bwt sync akun Google, buka playstore ajah.
14. Beberapa aplikasi backgroundnya tembus ke wallpaper. Kalo ngga suka bisa diakalin via gravitybox (download sendiri yah). StatBar juga sama & ngakalinnya silahkan pake gravitybox.
15. Kalo ga suka sama fontnya, ganti yg di folder root/system/fonts font2 ini : Clockopia.ttf DroidSans.ttf Roboto-Regular.ttf. Nah, yang gw nemu cuma Ubuntu Font for Android dan ga flashable. download aja sesuai kebutuhan dari sini : http://bit.ly/Koleksi-Ubuntu-Font

16. Kalo mau layar jd tambah manteb alias ngerubah density, buka build.prop pake root explorer, open in text editor, tambahin ro.sf.lcd_density=n n terserah mo diisi berape, yg jelas antara 180 - 240. Kalo mau pake navbar, buka build.prop pake root explorer, open in text editor, browse ke paling bawah & hapus tanda # dari #qemu.hw.mainkeys=0
18. Kalo ngga suka beberapa app bawaan, tinggal delete aja yg ada di root/system/app sama di root/vendor/operator/app
19. USB OTG, download usb otg helper dari playstore. Makenya tinggal Mount biar sdcard kebaca di file manager, kalo udah selesai jangan lupa Unmount.
20. Ada 2 aplikasi Contact/telepon dan 2 aplikasi mms/sms. Cobain satu2, pilih yang lu suka, abis itu buang salah satu pake root eksplorer kalo hapal nama aplikasinya atau pake Link2SD (udah gw sediain).

Link Download :

1. Original development (Trial 8th) : http://bit.ly/Oppo-StockAosp-D1-8 (Discontinued)
2. Lite version : http://bit.ly/Lite-Mod_1

Maap ga nulis change log

As Always, kerusakan apapun karena ROM, Tanggung Jawab Lu Sendiri.

Credits :
-. Allah the most gracious and the most merciful, the one who brought the beginning and brought the end. All is
naught without Allah's permission.
-. My lovely wife, thank you for being the one that gives comfort to my heart.
-. All of the Find 5 Mini Indonesia group members on Facebook.
-. Mr. Ajo Grage for his AOSP Rom that he has shared to us.
-. My Mom who have always been soooooo patient enough to see her son did stuff that she may be hated but keep silent about it (but shown from her face accidentaly)
-. And a lot more person/persons, developers or company, specially the open-source community for taking their product for developing this rom, legitly or by pirating (oops, Sorry).
-. Bit.ly for link shortener

Selasa, 25 Agustus 2015

AOSP JB by AJO GRAGE suitable for daily use

Awalnya karena dulu di grup lama Find 5 Mini ada yg nanya link AOSP Turbo bang Bewok ga bisa di akses, bang Ajo ngasih link rom AOSP. Setelah pindah ke grup Find 5 Mini yg baru, gw sangkain link dari Bang Ajo rom yg sama dengan AOSP Turbo bang Bewok. Setelah agak lama baru nyobain lagi & baru ngeh kalo beda. Beruntung Nih Hari ada kesempatan minjem kompi, yaudah gw bikinin deh doc khusus bwt AOSP by Bang Ajo Grage.

Feature :
You got every thing basic in the original rom have except screen-off gesture

Yang jelas sih fontnya beda, jam ditengah agak ngeganggu kalo ada notif panjang, network speed monitor ada di pojok kiri tapi lelet bener dan bikin icon notif maju mundur, usb otg ga work tapi bisa diakalin sih. Sensor jauh lebih lengkap dibanding AOSP Turbo & AOSP basicnya bang Bewok. Menurut gw, personally.

Link Download : https://docs.google.com/uc?export=download&confirm=3CGb&id=0B90lzeHdhzSRMEdFQUk5V3NxQVU

As Always, kerusakan apapun karena ROM, Tanggung Jawab Lu Sendiri. Gw paling bisa bantuin doang.
Makanya, sebelom nge-flash, ada baiknya lu melakukan :

1. Berdo'a
2. Pastiin udah pasang custom recovery
3. Berdo'a lagi biar afdhol
4. Bikin backup rom yg saat ini lu pake via custom recovery
5. Sambil nunggu selesai ya, Berdo'a lagi

Nah mulai ngeflash nih, siapin hati jangan sampek keder duluan :

6. Kalo udah, Format /system, /data, /cache & /dalvik cache
7. BTW, sembari ngeformat jangan lupa berdo'a yah, kali aja salah format malah......... ya resiko lu sih
8. Udah? install zip, pilih lokasi rom (sebaiknya ga dimasukin ke folder manapun, kalo masih di folder Download ya keluarin aja
9. Seperti biasa, banyakin berdo'a soalnya proses hampir selesai
10. Ntar kalo udah selesai biasanya auto-reboot, mulai deh Do'anya dikerasin lagi biar yakin ga bootloop
11. Kalo udah masuk HomeScreen ya aman deh.
12. Bwt sync akun Google, buka playstore ajah.

Notes :
1. Kalo ga suka sama fontnya, ganti yg di folder root/system/fonts font2 ini : Clockopia.ttf DroidSans.ttf Roboto-Regular.ttf
2. Kalo ngga suka jam statbar ditengah & ada network speed monitor di pojok kiri, bisa flash ini : http://www.mediafire.com/download/f16ptbdm24fvxpz/maxdi_transparent_4deodexed.zip tapi nanti recent appsnya jadi standard AOSP bukan kaya' HTC Sense lagi
3. Kalo mau layar jd tambah manteb alias ngerubah density, buka build.prop pake root explorer, open in text editor, tambahin ro.sf.lcd_density=210
4. Kalo mau pake navbar, buka build.prop pake root explorer, open in text editor, tambahin qemu.hw.mainkeys=0
5. Kalo ngga suka beberapa app bawaan, tinggal delete aja yg ada di root/system/app sama di root/vendor/operator/app
6. USB OTG, download usb otg helper dari playstore. Makenya tinggal Mount biar sdcard kebaca di file manager, kalo udah selesai jangan lupa Unmount.

Sebenernya gw sempet nguprek2 rom ini, kalo mau nyoba, silahkan sedot di :
1. http://www.mediafire.com/download/zbytvzvbimslqg7/Oppo-StockAosp-D1-4.zip (Trial 4th)
2. http://www.mediafire.com/download/vn2ycga7wgpgoob/Oppo-StockAosp-D1-6.zip (Trial 6th)

Installer script dan tweak dari rom AOSP bang Ajo ga gw oprek sama sekali karena gw ga tau caranya & kayanya modifikasi gw ga massive hehehe. Kalo ada kesempatan, emang ada yg perlu ditambahin/dikurangin/diganti dan gw blom beralih ke KK atau tertarik ke hape laen (kalo yg ini sih kayanya masih bakal lama deh, yen duite ono gitu looh) rom hasil oprekan gw akan gw update terus.

Kalo bwt oprekan gw, silahkan komplain ke gw via PM atau disini juga boleh.

As Always, kerusakan apapun karena ROM, Tanggung Jawab Lu Sendiri.

Credits :
-. Allah the most gracious and the most merciful, the one who brought the beginning and brought the end. All is naught without Allah's permission.
-. My lovely wife, thank you for being the one that gives comfort to my heart.
-. All of the Find 5 Mini Indonesia group members on Facebook.
-. Mr. Ajo Grage for his AOSP Rom that he has shared to us.

-. My Mom who have always been soooooo patient enough to see her son borrowed her laptop every time I came to her house.